Wednesday, August 15, 2012

Retaining Wall

First, we staked out where we wanted the wall to go. 1) for measuring purposes, 2) to make sure we kept working in a straight line. Also, We put the string at the height that we wanted the wall. When figuring out how many blocks you need, you will need to know both the length and the height of the wall.


Next, we dug the trenches. Take extra care to make sure that the bottom of the trench is level. We have super hard dirt, so we had to use a pick ax to dig.


Once the trench is reasonably level, add a couple inches of gravel:
Use the tamper to level out the gravel, then use a landscaping level to make sure that it really is level.
The trench should be dug deep enough that the block is buried a couple inches below the ground level, even though it is laid on top of a couple inches of  gravel.
We started at the low point in our yard, then, when we got to the point that the blocks were totally buried by the ground level, then we would step it up.
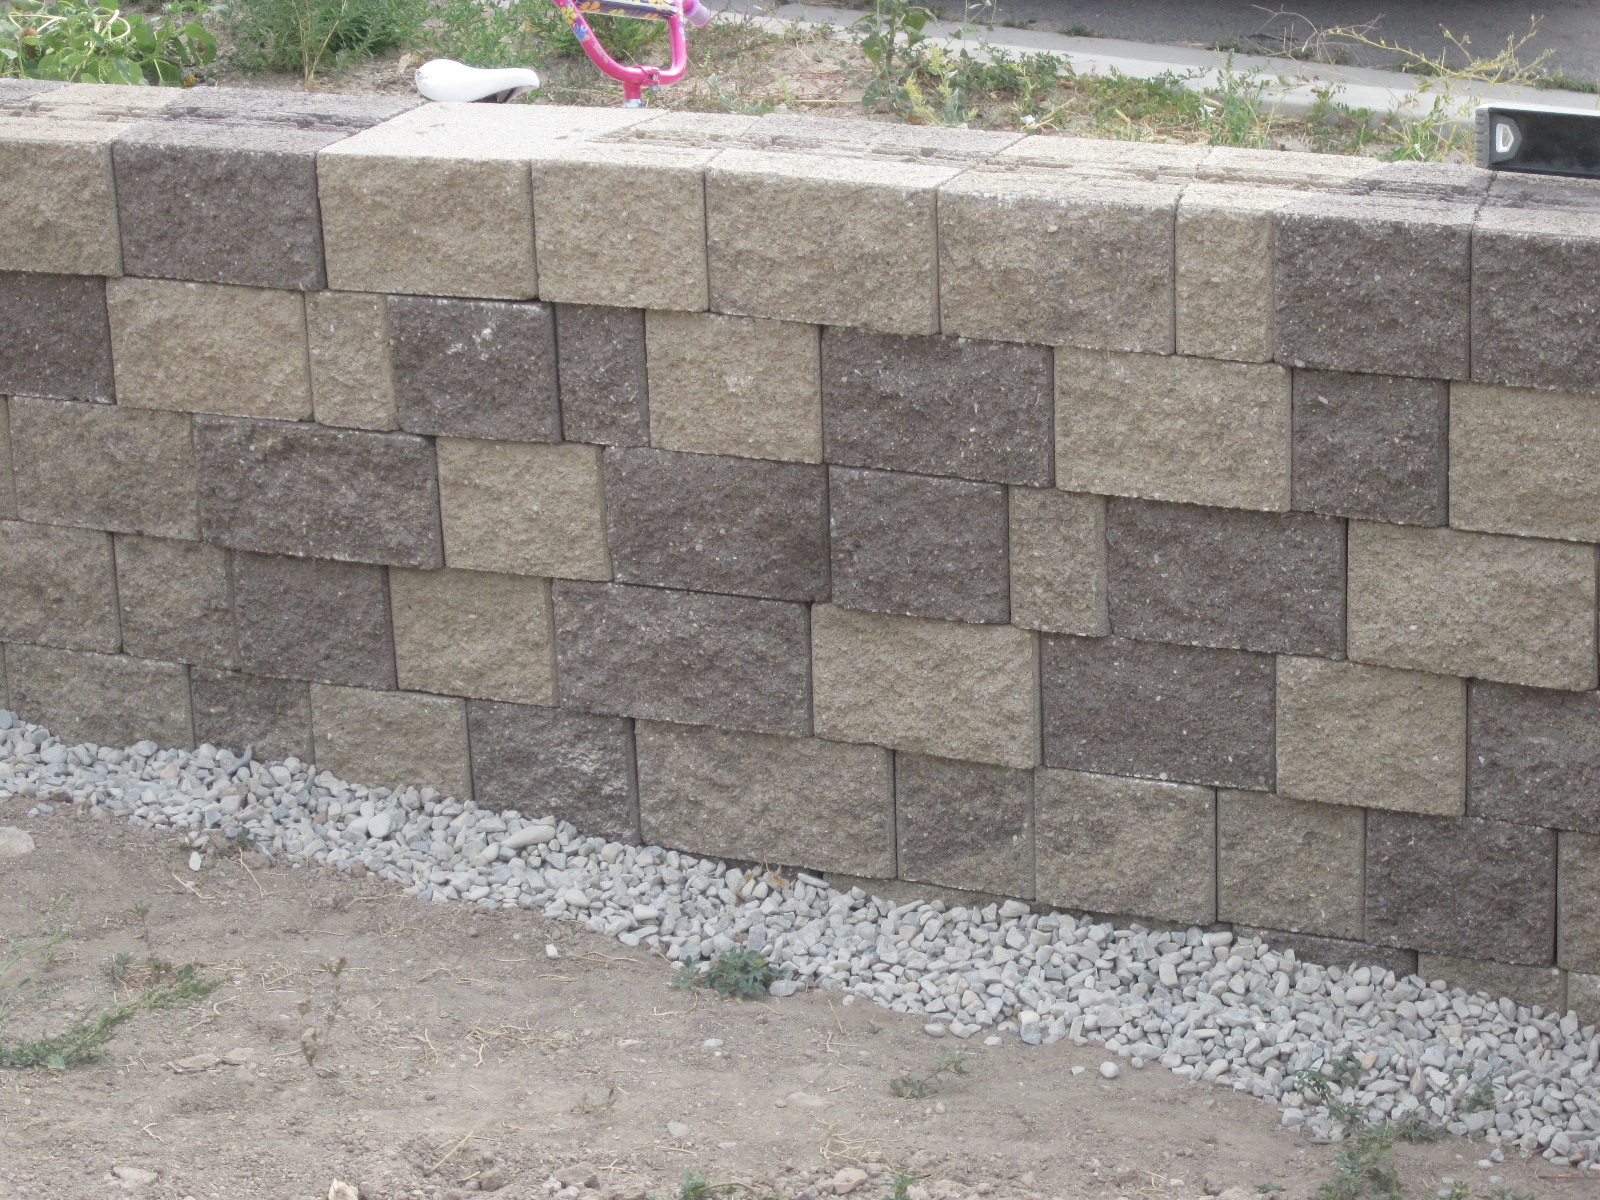
Can you see how the top of the block on the left is right at ground level? Then right next to it, is the bottom layer of gravel?
 When you step the digging up a level, be sure that you still dig deep enough so that the top of the gravel layer is level with the top of the block next to it.


We re-staked at ground level, so that we could be sure we were going in a straight line:


Be sure to check how level you are at all stages of this project:


We ended up putting a couple of sets of stairs in, too. One wide long set leading to our front door:


And one small, tight set on the side of the house:
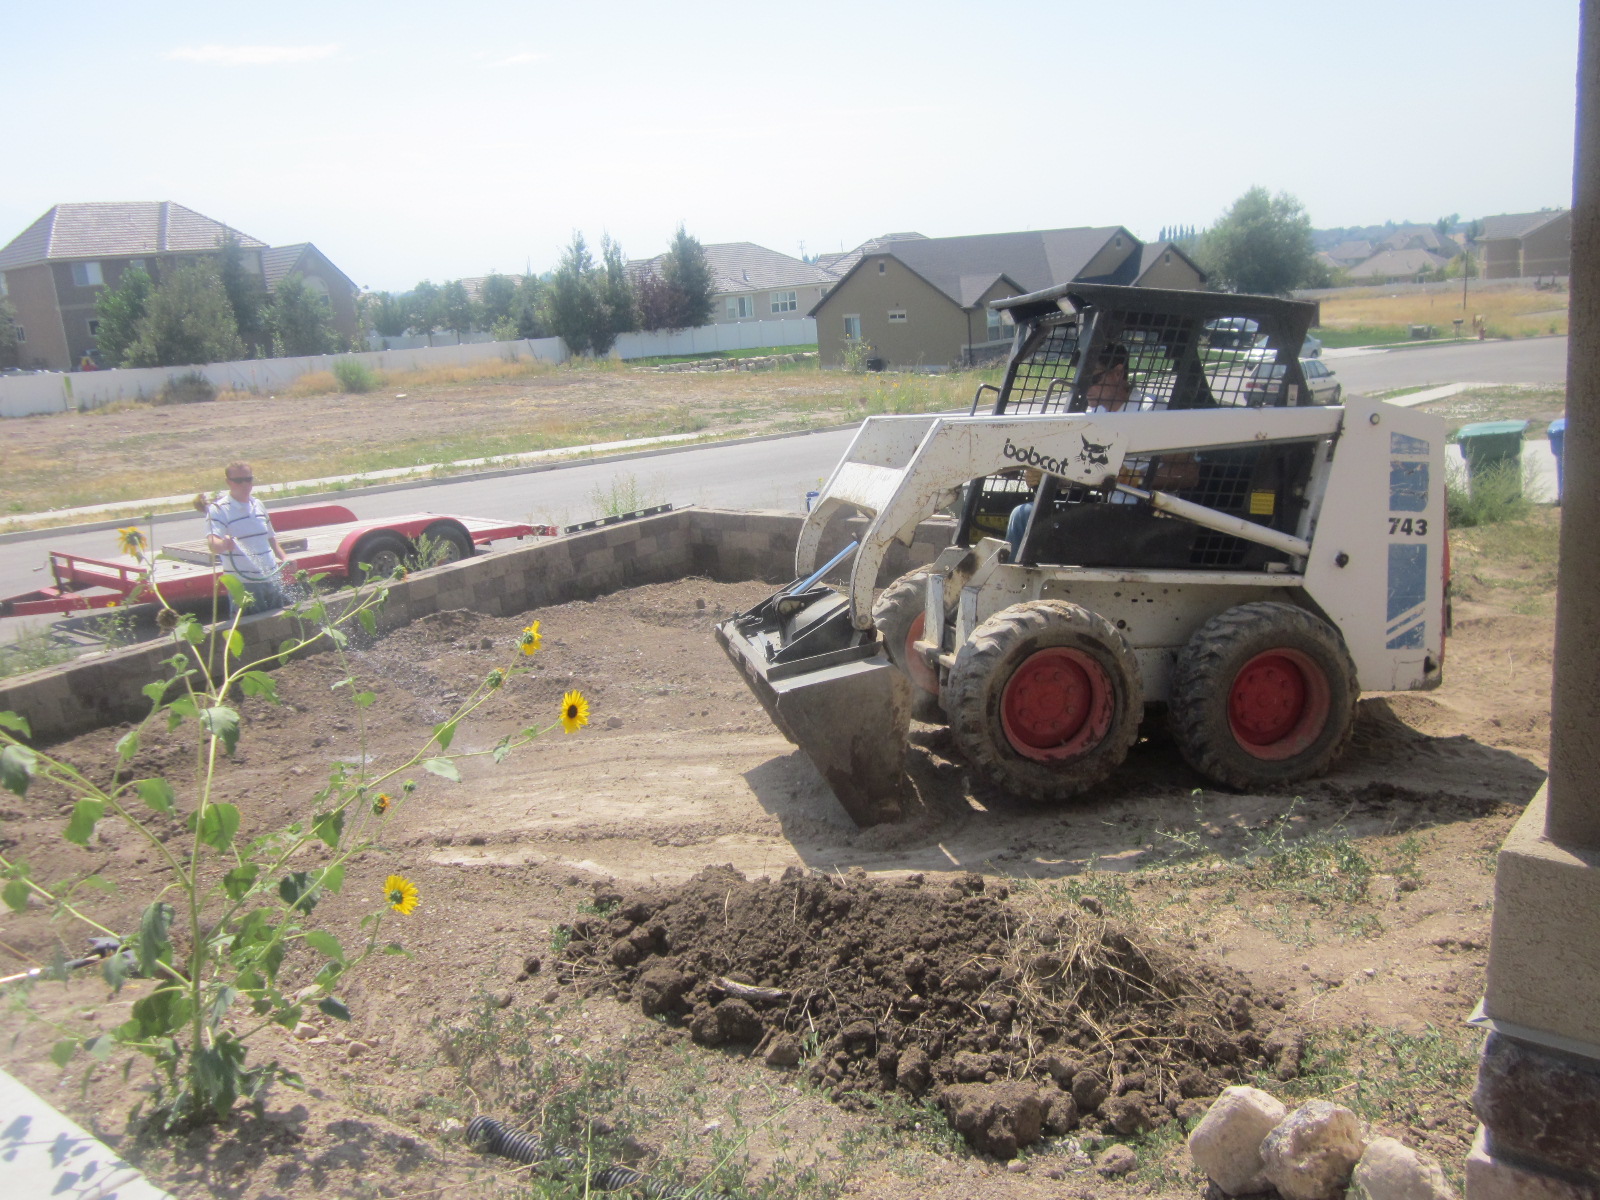
Once the wall was (almost) all done, we used a Bobcat to haul dirt in and fill it up. We did leave a small portion of the wall undone, so that there was somewhere for the Bobcat to drive in and out of:
My Father In Law drove the Bobcat while my hubs sprayed the dirt all down with a hose. The water helps the dirt to pack down a little better, so that -hopefully- there is not as much "settling" later on, when we have a lawn there.


The finished product!


Also, you want to be sure to fill in the sides of the trench with plenty of gravel, or other drainage material, before covering it up with dirt. Talk to the people you buy the materials from, they should have tips for you on building this kind of a thing!

Grow Your Own Avocado: Dirt or Water?

I wanted to grow my own Avocado Tree. All the instructions I found online described suspending the pit in a glass of water with toothpicks. There was ONE website, that mentioned that planting it in dirt would lead to faster growth, but then she gave no instructions for planting, just for suspending in water! Anyway, I decided to try both ways and see what worked better.

I cut open an Avocado, being careful not to touch the pit with the blade of my knife or with the spoon that I used to pull it out of the center. I washed the pit off, poked it with 4 toothpicks and suspended it in water. A couple months later, this is what it looks like:
One nice root, but no leaves or anything else, yet.

 A couple of days AFTER suspending the above pit in water, I opened up a second Avocado. I burried it only half-way in the dirt, and set it on a west facing window sill. I water it daily, keeping the dirt fairly moist. Now, a couple of months later, this is what it looks like:

Apparently, dirt is better. Which makes sense. It's not like the pits get randomly suspended in water in nature, right?

Potted Plants: Bromeliad

Ok, so, some time ago, I raided Home Depot's clearance plants and ended up with a cool little plant that I new nothing about. It turns out that it is a Bromeliad, which are pretty unique little things.
Bromeliads only flower once in their life time. Their flower does not look much like a flower, though, it looks more like a long colorful shoot of funny leaves coming straight up from the center of the plant. Anyway, I got this Bromeliad on clearance because it has already flowered. Nice, right?

Well, after a Bromeliad flowers, then, if it is happy with life, it will start to produce little baby plants, called pups. These pups grow right out of the side of the plant. Like this:

Can you see those? Those are two different pups, currently growing on the side of my Bromeliad. You see how they are tucked in behind one of the mother plant's leaves? They will continue to grow there as long as you let them. But if you would like, once they get to be 1/3 or 1/2 the size of the mother plant, you can transplant them and grow them as their own separate plant. The Pups there are actually the 3rd and 4th pups that my plant has produced. Back in June, I pulled the first two away and planted them in their own pot. I found instructions online that talked about pealing the mother plants' leaf away to reveal the pup's own root system. I found no such root system. The roots on my pups were basically non-existent. But I went ahead and planted them, anyway. And it turned out totally fine. Bromeliads get most of their water and nutrition from their leaves. Their roots are basically only there for an anchor support. This is, obviously, pretty unique. Absorbing water through their leaves means two important things: 1) Allowing the dirt to get too wet, or planting a Bromeliad in too large of a pot, can cause root rot. 2) When you water a Bromeliad, you simply pour the water right into the center of the plant, instead of into the dirt around it:
Here are my two older pup's transplanted in June:

 I used too large of a pot, I think, but I am careful not to let the dirt get too wet, and they seem to be doing fine!
More info on Bromeliads and their Care HERE!

Storage Boxes

I started with this:

I regular box full of the hubs's cords and junk. Pretty bad eye-soar, right?
Ok, so, you will notice --also in the above picture--all the items I needed for this project: 1) Packing Tape, 2) Scissors, 3) Fabric, 4) Hot glue gun.

Step 1) Tape flaps upright. You could also just cut them off, for a shorter storage box.
Step 2) Wrap box with fabric. I found this fabric right by the burlap at Joannes. It is sort of plasticky feeling.


Step 3) Hot glue all the edges, on the under side and a couple inches down inside the box. 
Finished Product:
Looks much nicer, although, I still need to find something else to do with that keyboard!