Found this tutorial via Pinterest:
http://www.livingwithpunks.com/2010/05/tutorial-land-of-nod-inspired-floor.html
And here is my finished product:
The piping really is not very hard to work with, and considering I am a TOTAL rooky at sewing...that is really saying something! It's a really good tutorial. I skipped the handle. The kids love 'em and they go great in the pink and green polka dot room!
Showing posts with label Interior Decorating. Show all posts
Friday, April 19, 2013
Wednesday, October 31, 2012
Curtains
We are FINALLY getting around to mounting our curtains! Now that summer is over and the curtains will just be open all of the time. Nice!
In the Master Bedroom, I found the brackets and rod at Ikea and ordered the sheer curtains through Groupon. They are Maytex sheer curtains and I got the pair for about $19 (counting shipping).
In the family room and the dining room, we bought 10 foot full round rods from Home Depot, raw wood brackets and round finials from Hobby Lobby, and used some wood stain from an old project. I sanded the wood down, used some wood conditioner (and I actually tested it: using the conditioner first DOES make a difference!), then put two coats of the stain on everything.
In the Master Bedroom, I found the brackets and rod at Ikea and ordered the sheer curtains through Groupon. They are Maytex sheer curtains and I got the pair for about $19 (counting shipping).
I found the finials at Hobby Lobby for something like $8 for the pair.
In the family room and the dining room, we bought 10 foot full round rods from Home Depot, raw wood brackets and round finials from Hobby Lobby, and used some wood stain from an old project. I sanded the wood down, used some wood conditioner (and I actually tested it: using the conditioner first DOES make a difference!), then put two coats of the stain on everything.
The curtains are $10 for a pair at Ikea.
Wednesday, August 15, 2012
Potted Plants: Bromeliad
Ok, so, some time ago, I raided Home Depot's clearance plants and ended up with a cool little plant that I new nothing about. It turns out that it is a Bromeliad, which are pretty unique little things.
I used too large of a pot, I think, but I am careful not to let the dirt get too wet, and they seem to be doing fine!
Bromeliads only flower once in their life time. Their flower does not look much like a flower, though, it looks more like a long colorful shoot of funny leaves coming straight up from the center of the plant. Anyway, I got this Bromeliad on clearance because it has already flowered. Nice, right?
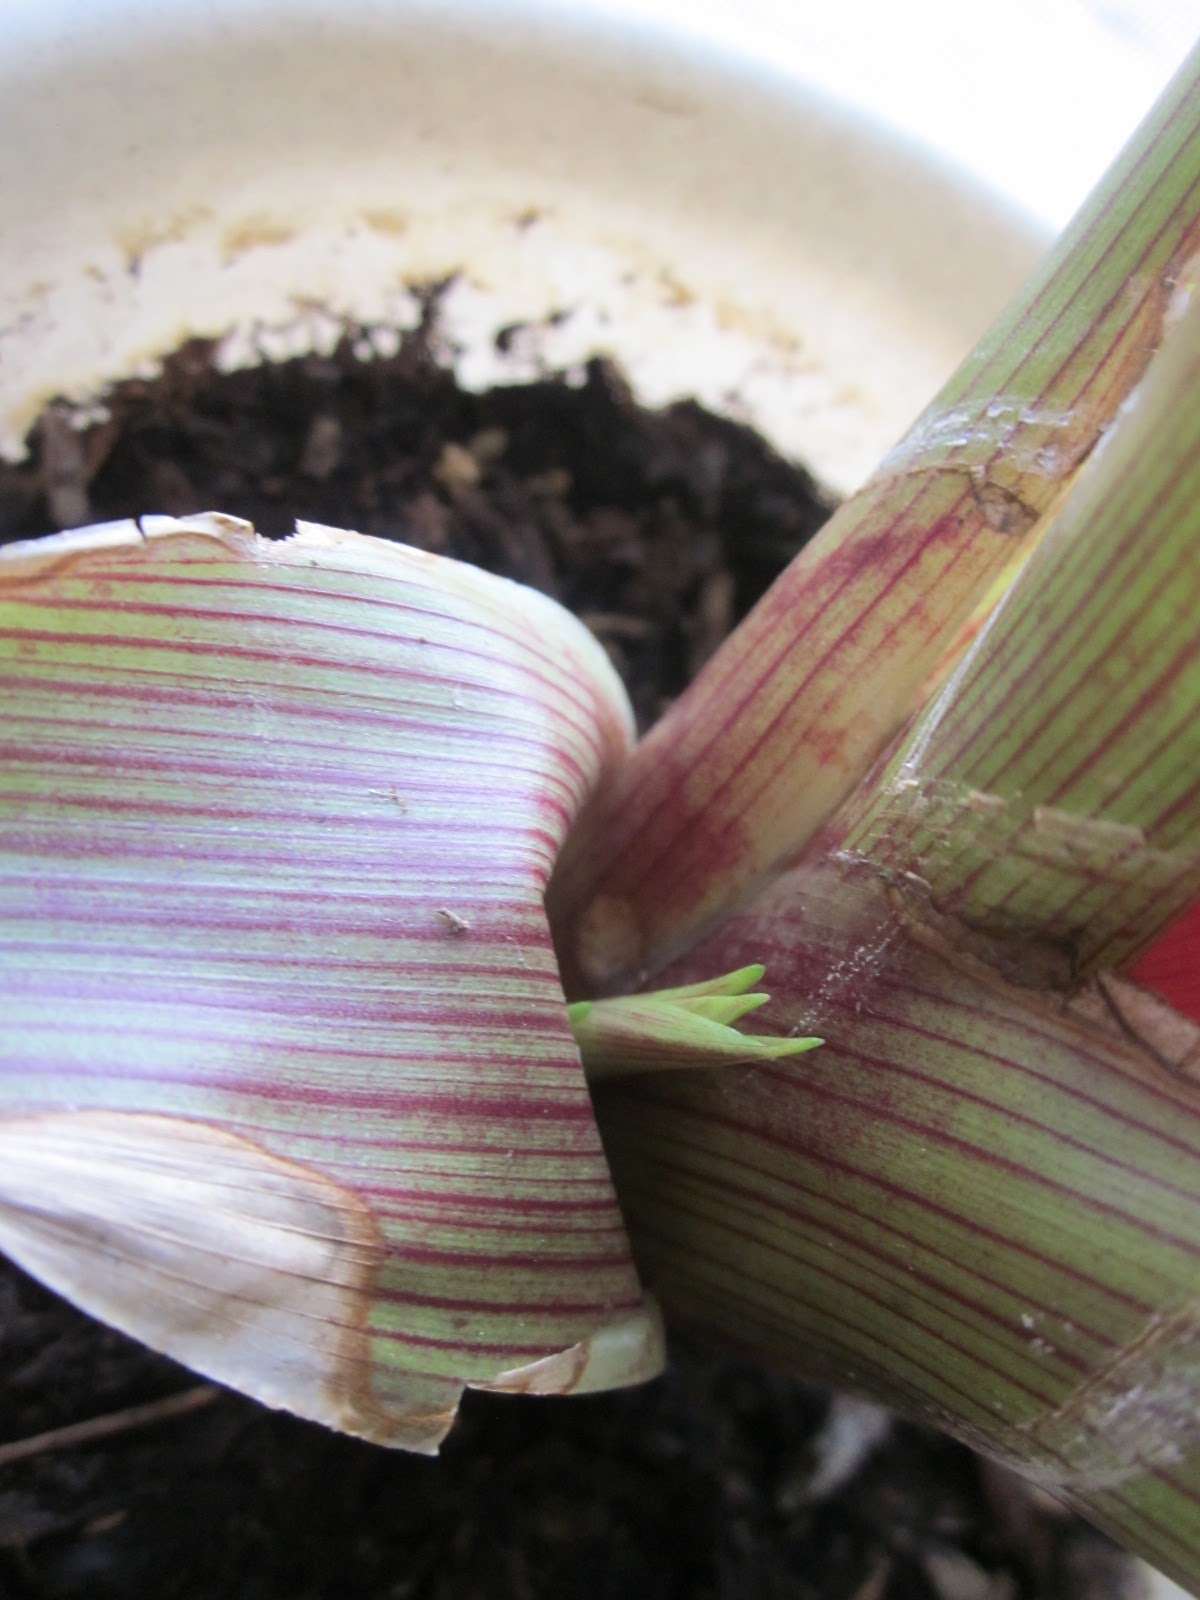
Well, after a Bromeliad flowers, then, if it is happy with life, it will start to produce little baby plants, called pups. These pups grow right out of the side of the plant. Like this:
Can you see those? Those are two different pups, currently growing on the side of my Bromeliad. You see how they are tucked in behind one of the mother plant's leaves? They will continue to grow there as long as you let them. But if you would like, once they get to be 1/3 or 1/2 the size of the mother plant, you can transplant them and grow them as their own separate plant. The Pups there are actually the 3rd and 4th pups that my plant has produced. Back in June, I pulled the first two away and planted them in their own pot. I found instructions online that talked about pealing the mother plants' leaf away to reveal the pup's own root system. I found no such root system. The roots on my pups were basically non-existent. But I went ahead and planted them, anyway. And it turned out totally fine. Bromeliads get most of their water and nutrition from their leaves. Their roots are basically only there for an anchor support. This is, obviously, pretty unique. Absorbing water through their leaves means two important things: 1) Allowing the dirt to get too wet, or planting a Bromeliad in too large of a pot, can cause root rot. 2) When you water a Bromeliad, you simply pour the water right into the center of the plant, instead of into the dirt around it:
I used too large of a pot, I think, but I am careful not to let the dirt get too wet, and they seem to be doing fine!
More info on Bromeliads and their Care HERE!
Storage Boxes
I started with this:
I regular box full of the hubs's cords and junk. Pretty bad eye-soar, right?
Ok, so, you will notice --also in the above picture--all the items I needed for this project: 1) Packing Tape, 2) Scissors, 3) Fabric, 4) Hot glue gun.
Step 1) Tape flaps upright. You could also just cut them off, for a shorter storage box.
Step 2) Wrap box with fabric. I found this fabric right by the burlap at Joannes. It is sort of plasticky feeling.
Step 3) Hot glue all the edges, on the under side and a couple inches down inside the box.
Finished Product:
Looks much nicer, although, I still need to find something else to do with that keyboard!Tuesday, July 24, 2012
Thank You Ikea!
We need curtains up in our family room. The windows are west facing, and some curtains would definitely help us save on cooling the house. So, I came across this neat lady's post on Pinterest. I was so excited! She said she got most of her supplies at Lowe's, so I ran out to Lowe's the next day! Sadly, I did not really find ANY thing at Lowe's! Well, not anything that would work for me. I need a 12' curtain rod, and I could only find an 8' wooden rod at Lowe's. So, when I got home, I hopped on the internet. I was able to find some brackets and finials at Hobby Lobby, and a canvas drop cloth at Walmart, but I could not find a 12' wooden pole, ANYWHERE!
So, I was at Ikea today and found a black metal rod for $6, brackets for $1.50 each and add on pieces (for the layered look) for $0.50 each! They also had a few ends to choose from, though I didn't really care for any of the ends that they had in stock. But I can now have a curtain rod for under $15! Nice.
Thursday, July 12, 2012
Rag Rug
I made a rag rug! I found it on pinterest, and I have ALWAYS wanted to make one, so I jumped at the chance! If you can do a basic crochet chain, you can ABSOLUTELY do this! It was so simple! And if you cannot crochet...learn the basic chain stitch from someone...or online...and then you can ABSOLUTELY do this!
The instructions can be found here. I used one set of queen sized sheets (that we getting worn and holey) and it turned out this size:
I bout some fabric dye and dyed half of the sheets. If I were to do it over, I would have used a LOT more dye! I did not realize how little fabric I would be able to dye with one package of dye. But I like how it turned out, anyway, so, I feel good about it!
Other than that...the instructions were not real clear about how often to add an extra stitch, but I just did one every time I felt like my holes were not lining up quite right, anymore, and it seemed to work fine.
Good luck!
Archway Curtains
We have an archway with no door between our master bedroom and our master bathroom. This works find for us, but -just in case, for some reason, if we want to close it off- we wanted to hang some curtains of some sort. But, we also didn't want to diminish the archiness. So, I hopped online and found this:
It is a clear, flexible curtain rod and comes with the hardware for mounting. All we had to do was saw it to the appropriate size, and mount! It was fantastic!
Next, we needed some curtains and some pull backs. The tie backs we bought at Lowes (we actually got 3 and are using one for a towel rod in the laundry room), and we also found this curtain there. We just bought one panel, then I cut it down the center and seamed it up, to make two panels! I am loving the finished product!
Wednesday, February 29, 2012
Potted Plants
Found these cute little mini rose bushes at Walmart on "Day After Valentine's Day Clearance." Apparently, mini rose bushes are a Valentine's Day plant??? Anyway, I only paid $1.25 each. Sweet! And I love them! They make me so happy every time I see them!
Their thorns are not much to speak of. In fact, my 6 month old was grabbing branches of this plant and was unharmed.
One important thing to note about rose bushes, is that their dead leaves can b
reed/spread plant disease, so don't let the dead leaves and branches stay on the ground, get rid of them!
One fun thing about rose bushes, is that it is GOOD for them when you cut the bloomed flowers off. Doing so actually encourages the plant to produce more flowers. So enjoy those roses! Treat yourself to a vase full of them!
I also found some clearance plants at a hardware store. This one is an orchid. I think they are so pretty, but I knew nothing about care for an orchid. I have been doing some googling, though, and have learned that these plants are EXTREMELY prone to root rot. So much so, in fact, that you can't even plant them in dirt. You need to buy a special orchid mix to plant them in (either moss or a mixture of bark and other things). Also, you should not water orchids too often, nor allow the water to get trapped in the crevices of the leaves.
Orchids do require feeding, so you will have to also purchase an orchid fertilizer and will need to apply it regularly...about once a month?
Although the orchids don't like to be too wet, they also don't like to be in too much light. The sunlight they get should be indirect light, filtered through sheer curtains, if possible.
Lastly, for these fickle plants, you will need to re-pot these plants into slightly larger pots every year or two. Interesting little things!
I'm not totally sure what kind of plant this is, but it reminded me of California and I liked it...So I bought it! I guess I'll figure it out as I go.
Update: It's a Bromeliad! Learn more in my Bromeliad post!
Finally, we found this Yucca Plant at Ikea. These are pretty cool little indoor trees. They require next to no care. They should not be in much light, and they only need to be watered every few weeks, "when the dirt becomes dry." Nice!
Sunday, January 22, 2012
Jungle Room
Next comes the nursery!


We got about 5 of these inflatable animals from the party.
We also got these tiki torches from the party!
I crocheted twine to make some holders for them. (Twine is NOT the easiest thing to crochet, it turns out, but I like the way it looks for the jungle theme).
Then hung them on these command hooks by the crocheted holders.
I had some leftover sheer, green, tool of sorts. So I tied the pieces together and wrapped it with twine to make "vines" to hang over the crib.

There was a big Halloween Party at the hubs' work, a few months ago, that involved some jungle decor. Afterwards, a lot of the stuff was "up for grabs" and he asked me if I wanted some of it. For free? Yes, we can definitely have a jungle room SOMEWHERE in the house, if it means I can decorate for free or close to it!
The hubs made this sun for the party. He cut out cardboard and covered it with yellow fabric. Love it! (And, of course, I mounted it with Command Strips!)
We got about 5 of these inflatable animals from the party.
Polka Dot Room
We are in a new house, so let the projects begin! So much to decorate, so little budget. :)
I started with the girls room...
Add a trip to the dollar store, where I found a few of these organizers...
And this plastic vase...(which I then filled with all our bouncy balls for the polka dot look).
I found these polka dot fleece throws at Walmart for $3, nice! Got 2 of them, and sewed some Velcro across the top (the soft side, so that when I want to wash these "curtains" they won't stick to everything in the wash).
Then, I got some Command Strips (we are using A LOT of these in our new house. Love 'em!) and used them to mount the other side of the Velcro across the top of the windows. 
And voila! Non-destroyable curtains!
Now if the kids hang on them or whatever, they will simply come down, and I can then velcro them back up. No damage, no problem!
We did go through a couple of failed attempts at these curtains, and during that phase when I wasn't sure it was going to work, I went and got some Con Tact Paper and "frosted" their windows with it, too. (My mom used to always have Contact Paper on hand. She used it to laminate things. She laminated EVERYTHING! Not a bad idea when you've got 7 kids!)
Subscribe to:
Posts (Atom)