Showing posts with label Crafts. Show all posts

Wednesday, October 31, 2012

Despicable Me Minion

I love family themed costumes. This Halloween, we all went as Despicable Me characters. Now, you can't have a Despicable Me theme...without...a MINION!

So, I took 2 giant Nesquick tubs (the kind from Costco) and duct taped them together:
 We have some yellow, microfiber rags, so I taped one around the tubs. It didn't quite fit all the way around, and I didn't care enough to cover his back...

Then, I found some unused denim scraps:


Cut up the center for some legs:

Toilet paper rolls stuck in little black shoes:

 If I had more time, I would have made a cute little pocket for the little guys overalls, but I ran out of time. I just hot glued the pants to the microfiber rag.

Took a Mason Jar lid for the one eye:

cut out some white paper, drew the eye, and glued it to the inner part of the lid:

Used Duct Tape to fasten on the eye, and permanent marker to draw on a smile. Then I cut another microfiber rag in half, rolled the two sides up, and Duct Taped them on as arms: 
Pretty low key minion, but maybe it will help spark an idea for you, who knows?

Friday, July 27, 2012

Jean Stockings

It's Christmas in July! My husband keeps asking me why I am working on a stocking in July. I tell you what, though, the last thing I want to be stressed about during the Holidays is finishing a stocking on time! I am getting this project out of the way!

Step 1) Get some newspaper or whatever else you want and draw/cut out an outline of how you want your stocking to look (size, shape). Be sure to include an extra 1/2 in or so for the seam.
~~I already have some, so I turned one inside out and used it for my "pattern."


Step 2) Lay your "pattern" over some old jeans and cut two of them from the jeans. Be sure that one is facing one direction and the other is facing the other direction...does that make sense? Remember that when you finish your stocking, you will have two MIRROR images laying on top of each other, NOT identical images. So, for this whole project, just think through everything carefully and lay things out how they will be in the end so that you make sure to cut/sew in the correct spots.
~~See how one is inside up and the other is outside up? Mirror images.


Step 3) Pick fabrics that you want on tops/heels/toes of your stocking. Pin it how far down you want it, making sure it looks how you want it to look in the end.


Step 4) Turn the stocking over and pin the fabric into the inside of your your stocking. You want it to fold over and inch or so, so that it is well inside the opening of your stocking.

Then lay the other side on top, and do the same, making sure that the lines of fabric match. So that, on the finished product, you have a continuous circle. You want the heels and toes, etc to match up on the back and front halves. Pin accordingly.


Turn over and pin it into the inside again.

Step 5) Go back to the outside of your stocking, and UNPIN THE TOP FABRIC!


PULL THE FABRIC UP, SO IT IS OUT OF THE WAY WHEN YOU SEW THE INSIDE SEAM AND YOU DON'T END UP WITH A RANDOM SEAM IN THE MIDDLE OF YOUR PRETTY STOCKING TOP!


Step 6) Sew the inside seam of your top fabric.

Step 7) Go back and repin the outside of your top fabric, then sew it on.

Step 8) Pin your heel/toe fabrics where you want them/how you want them to look in the end. Again, make sure that your front and back halves match up.


Use your first heel/toe piece as the "pattern" for your second. Again, remember that you want a MIRROR image, NOT an identical image, so turn the fabric over and cut it out inside out for the second one.


Step 9) Sew on your heel/toe pieces.


Step 10) Once all the heel, toe and top pieces are sewed on, you can cut out letters to spell the owners name, or "Christmas," or "joy," or whatever else you want...or leave it blank! Sew letters on.


Step 11) Lay the top half of your stocking on top of your back half, so that your stocking is INSIDE OUT. Also, make sure that the top/heel/and toe pieces line up correctly. Pin all sides (EXCEPT THE TOP) together and sew. This is just like sewing a pillow case. You sew it all up, except one side, then flip in right-side out again! Voila!


You can do all sorts of combinations. have a heel and a toe, no heel, no toe. WHATEVER YOU WANT! ENJOY AND MAKE IT YOURS!


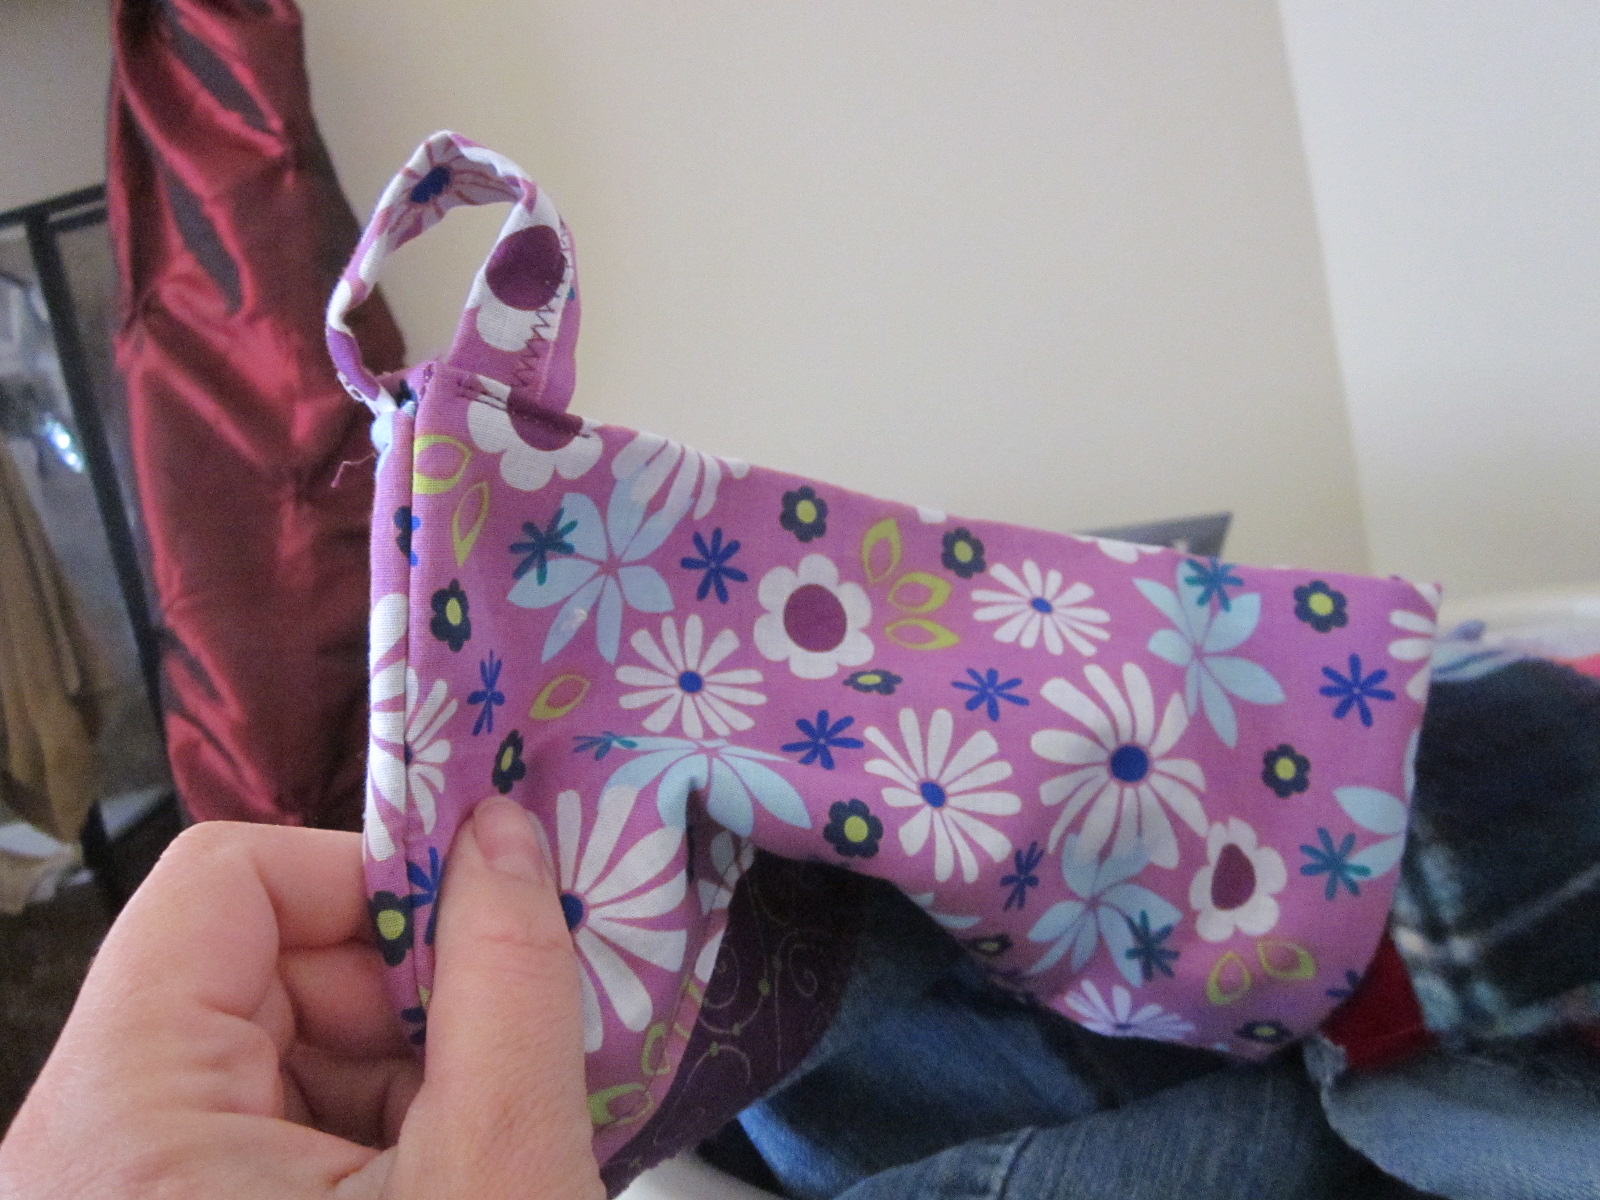
OH, YEAH! STEP 12) A HOOK! Just take a piece of fabric that matches, sew it to be a straight line, then sew it  on to the back of your stocking! Fleece does not work great as it stretches:


This super soft, bumpy fabric is hard to deal with, sometimes.


But this is a great hook:


Thursday, July 12, 2012

Rag Rug

I made a rag rug! I found it on pinterest, and I have ALWAYS wanted to make one, so I jumped at the chance! If you can do a basic crochet chain, you can ABSOLUTELY do this! It was so simple! And if you cannot crochet...learn the basic chain stitch from someone...or online...and then you can ABSOLUTELY do this!
The instructions can be found here. I used one set of queen sized sheets (that we getting worn and holey) and it turned out this size:

I bout some fabric dye and dyed half of the sheets. If I were to do it over, I would have used a LOT more dye! I did not realize how little fabric I would be able to dye with one package of dye. But I like how it turned out, anyway, so, I feel good about it!

Other than that...the instructions were not real clear about how often to add an extra stitch, but I just did one every time I felt like my holes were not lining up quite right, anymore, and it seemed to work fine.
Good luck!

Friday, April 27, 2012

Hair Things

This is what my kids "hair things" drawer has looked like for...way too long.

Thanks to Pinterest, I got the idea I needed for a solution. I started with buying a cheap ($6) soft wood frame from Hobby Lobby. Took several of the ribbons that I either don't care about or are too short to really be tied around my kids heads, and stapled them to the from (using my upholstery staple gun).
That gave me something to do with all those clips:

Then I screwed these hooks into the bottom of the frame (this I did by hand, since the wood was pretty soft)

 And that gave me something to do with the headbands. VOILA!

Friday, September 30, 2011

Block Letter Pictures


1. Buy block letters from your favorite craft store. Paint.
2. Find fun pictures, copy and paste into Word, and shrink to small sizes. Print.
3. Cut out pictures and arrange on letters.
4. Mod Podge the backs of the pictures and stick onto letters (Mod Podging the fronts of the pictures will cause the ink to smear).

Lighthouse Glass Block


1. Print off a cool background
2. Print off a cool picture of a lighthouse
3. Mod Podge the front of the background picture and apply to the glass block, smoothing out bubbles
4. Mod Podge the back of the lighthouse, and apply to the opposite side of the glass block, smoothing out bubbles
5. Voila!